Governor
Governor
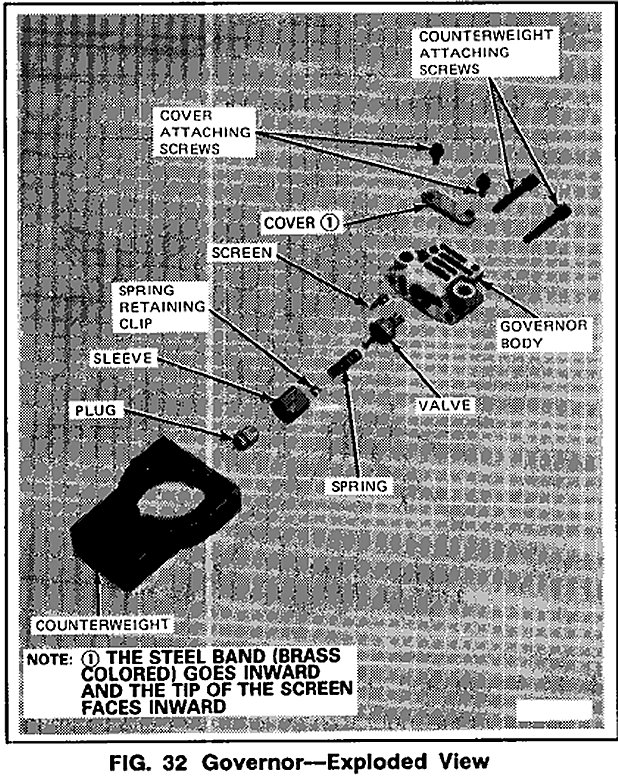
Refer to Fig. 32.
Removal
1. Raise the vehicle on a hoist or stands.
2. Disconnect the parking brake cable from the equalizer.
3. Disconnect the driveshaft from the rear axle flange and remove from the transmission. To maintain initial driveshaft balance, mark the rear driveshaft yoke and companion flange so they may be installed in their original position
4. Disconnect the speedometer cable from the extension housing.
5. Remove the engine rear support-to-extension housing attaching bolts.
6. Place a lack under the transmission and raise just enough to remove the weight from the engine rear support.
7. Remove the bolt that secures the engine rear support to the crossmember and remove the support.
8. Place a drain pan under the rear of the transmission case.
9. Lower the transmission and remove off extension housing attaching bolts. Slide the extension housing of the output shaft and allow the fluid to drain.
10. Remove and discard the extension housing gasket. NOTE; If the governor body only is to be removed, skip Steps 11 and 12.
11. Remove the governor-to-output shaft retaining snap ring.
12. Using a soft-faced hammer, tap the governor assembly of the output shaft. Remove the governor driveball.
13. Remove the governor-to-counterweight attaching screws. Lift the governor from the counterweight.
Installation
1. Lubricate the governor valve parts with clean transmission fluid. Make certain that the valve moves freely in the valve body bore.
2. Position the governor valve body on the counterweight with the cover facing toward the front of the vehicle. Install the two attaching screws, and tighten to 6-7 N.m (50-60 in-lbs).
3. Position the governor drive ball into the pocket of the output shaft.
4. Align the key way in the counterweight to the governor drive ball. Drive the governor assembly into the output shaft with soft-faced hammer if necessary.
5. Reinstall the governor to output shaft retaining snap ring. Clean the mounting surface on the transmission and on the extension housing. Position a new gasket on the transmission.
6. Raise the transmission high enough to position the engine rear support on the crossmember.
7. Secure the support to the crossmember with the attaching bolt and nut. Tighten the bolt to 68-94 N.m (50-70 ft-lbs).
8. Lower the transmission and remove the jack. Install the engine rear support-to-extension housing attaching bolt. Tighten the bolts to 82-108 N.m (60-80 ft-lbs).
9. Secure the speedometer cable to the extension housing with the attaching bolt.
10. Connect the parking brake cable to the equalizer. Adjust the parking brake as required.
11. Install the driveshaft, after aligning the index marks, in the transmission and connect shaft to rear axle flange.
12. Fill the transmission to the correct level with the specified fluid. Fluid - A/T