Ford Integral Carrier, Clutch Type Trac-LOC, Rear
Fig. 5 Exploded view of clutch type Traction-Lok limited slip differential:
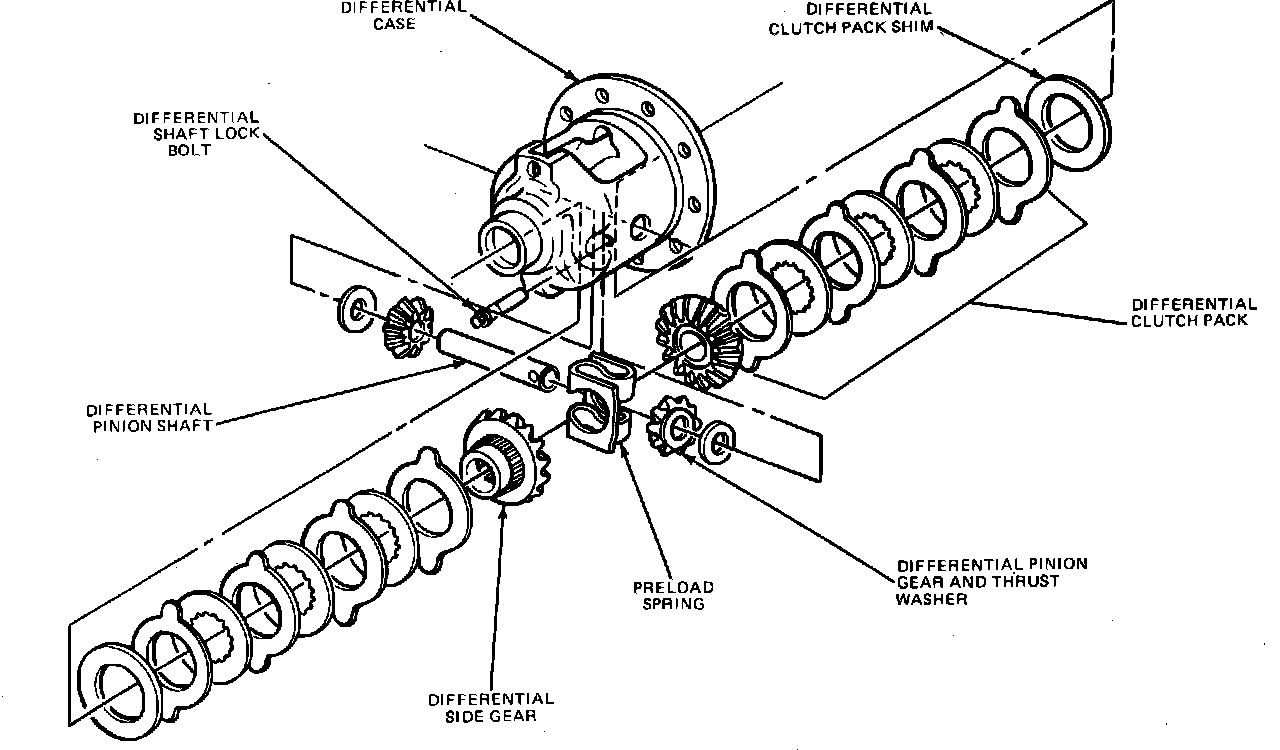
Overhaul procedures for this limited slip differential, Fig. 5, are the same as for ``Ford Traction-Lok Differential.''
Fig. 6 Exploded view of cone type limited slip differential:
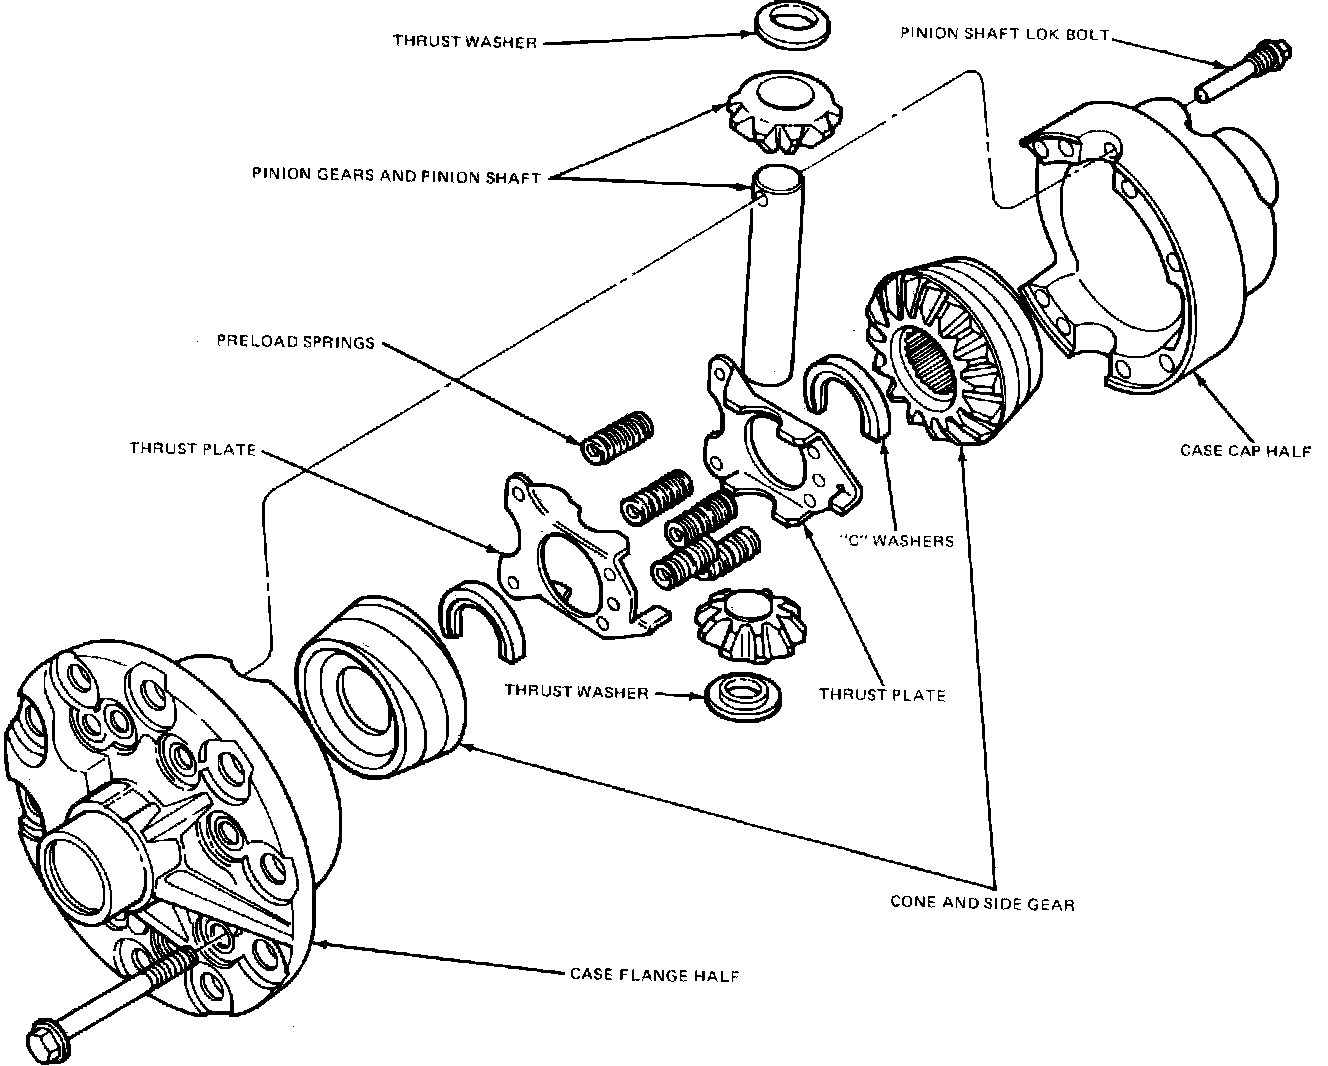
CONE TYPE LIMITED SLIP DIFFERENTIAL
1. Place differential case, Fig. 6, in large vise to load case at bearing journals so that preload of springs is overcome.
2. Loosen case securing cap screws until only 3 or 4 threads are engaged, then loosen vise slightly and tap flange half of case to spring it loose.
3. Remove case assembly from vise, flange half up, then remove cap screws and lift off flange half.
4. Remove side gear and brake cone assemblies, thrust plates, preload springs, pinion shaft, pinion gears and thrust washers. Note which cone comes from which half of case for proper assembly.
5. Clean and inspect as described under ``Cleaning and Inspection.''
6. Place cap half of differential in vise with inside of case half facing up.
7. Install proper cone in case and set it in position.
8. Assemble thrust plates, preload springs, pinion gears, thrust washers and pinion shaft in proper order, then install second cone assembly.
9. Install flange half of case over cone in position.
10. Install two remaining bolts finger tight. All oil must be removed from bolt and its mating surface before installation or a false torque reading will be obtained, possibly resulting in bolt breakage.
11. Place differential case in vise to load case at bearing journals so that preload of springs is overcome.
12. Install remaining retaining bolts, torquing evenly to 34---39 ft. lbs.
13. Install pinion shaft lock bolt finger tight, then ensure that rotating torque is at least 30 ft. lbs.