Canister-Type Fuel Filter Installation
CAUTIONIf the fuel filter canister is being serviced with the rear of the truck higher than the front, or if the tank is pressurized, fuel leakage or siphoning from the tank fuel lines could occur. To prevent this condition, maintain the vehicle front end at or above the level of the rear of vehicle. Also, relieve tank pressure by loosening the fuel fill cap. Cap should be retightened after pressure is relieved. If vehicle is warm, install the fuel filter before the pressure rebuilds.
1. Remove the reservoir shield on 4 x 4 vehicles by removing either three or four screws (depending on vehicle). On 4 x 4 vehicles it may be necessary to disconnect the rear of the front driveshaft to allow for tool clearance.
NOTE:
To maintain driveshaft balance, mark the rear slip yoke in relation to the transfer case yoke for correct positioning during reinstallation. Then remove the nuts and U-bolts (bolts for F350 transfer case) that connect the front driveshaft to the rear slip yoke of the transfer case.
2. Unscrew the lower canister of the reservoir using a flexible strap type oil filter wrench, and slide canister out from frame rail.
NOTE:
Fuel canister will be full of fuel.
3. Empty fuel from the fuel canister. Remove and discard the O-ring.
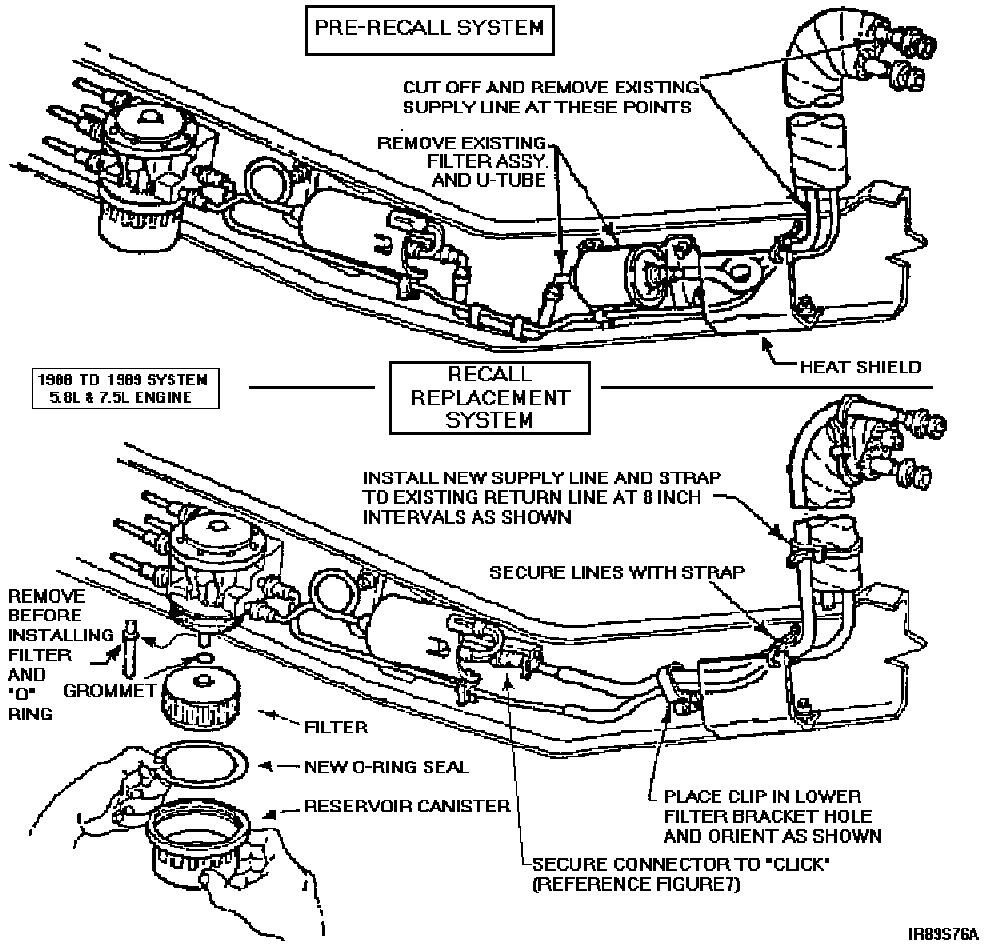
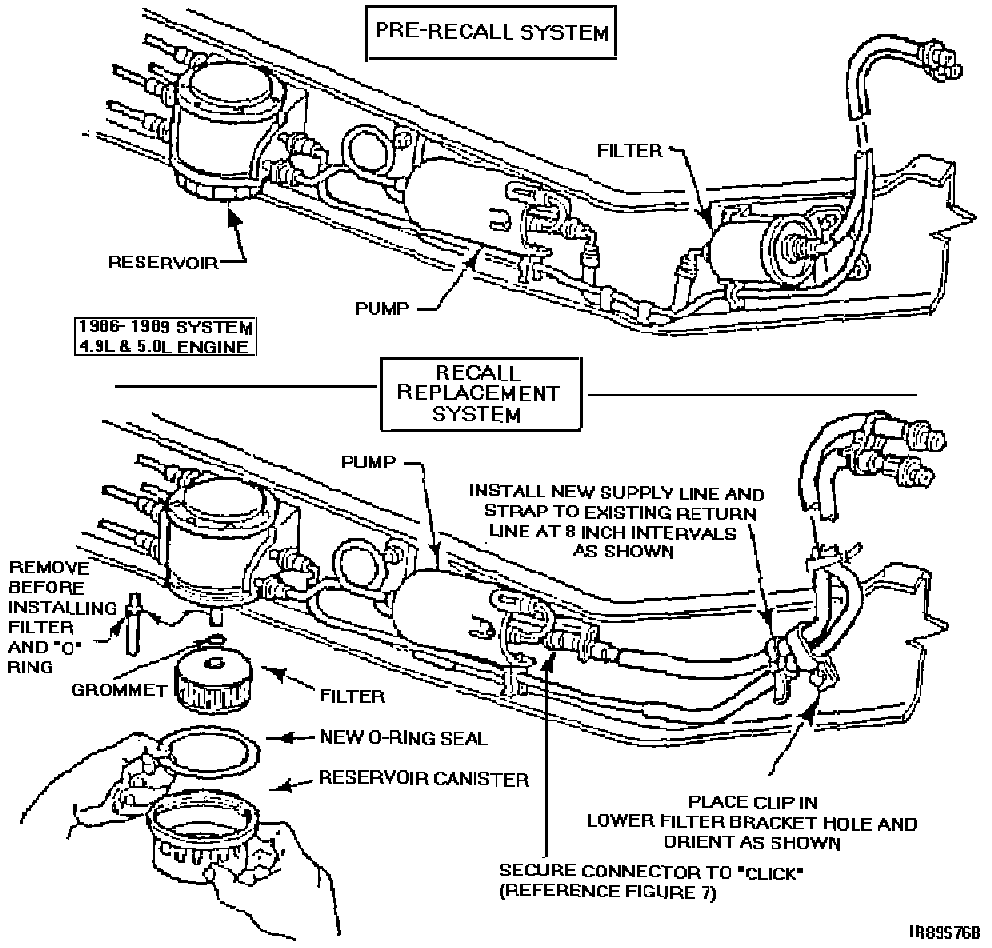
4. Remove the stand pipe from the reservoir by pulling it down sharply. Discard the stand pipe. Refer to Figures 1 and 2.
5. Install grommet (supplied with filter) into top of filter cartridge, then install the fuel filter cartridge into fuel canister.
6. Position new O-ring so that it is seated in the O-ring groove of the canister.
7. While keeping canister level, so as not to dislodge O-ring, position canister to bottom of reservoir housing and tighten loosely by hand. It may be necessary to loosen reservoir-to-frame mounting bolts to access the canister. Using a flexible strap type oil filter wrench, complete filter canister tightening by turning canister about one-sixth of a turn past initial O-ring compression.
NOTE:
The rubber grommet on the filter will automatically seat on the piloted stud of the upper housing as the canister is tightened.
REMINDER:
If reservoir-to-frame mounting bolts were loosened in above step, re-tighten.